
Understanding File Permissions
The chmod command plays a pivotal role in this process. It enables administrators to set or modify file permissions in a flexible and powerful way. By mastering chmod, system administrators can ensure files and directories have the correct permissions, safeguarding against unauthorized access or manipulation.
Linux security centers on file permissions, which govern how users interact with the system’s files and directories. Permissions are classified as read (r), write (w), and execute (x), specifying the actions a user may perform on a file or directory.

Types of Users
|
User Type
|
Description
|
|---|---|
|
Owner
|
The creator of the file, usually granted all permissions (read, write, execute).
|
|
Group
|
Users linked to a single group name, with permissions that may differ from the owner and others.
|
|
Others
|
Anyone not designated as the owner or a member of the group, having the minimal access rights by default.
|
The Three Permission Types
Read (r): This permission allows a user or group to view the contents of a file or list the contents of a directory. It is represented by the letter r in permission settings.
Write (w): The write permission empowers users or groups to modify the contents of a file or create and delete files within a directory. It is symbolized by the letter w.
Execute (x): Execute permission, represented by the letter x, grants the ability to run scripts or execute programs. Without this permission, executing programs or changing into directories is impossible.
The Three Permission Levels
In Linux, permissions are not applied globally but are assigned to specific categories of users. There are three main permission scopes that define who can access a file or directory.
User (u): This level refers to the owner of the file or directory. The user can be the person who created the file or a designated user with specific access rights.
Group (g): Group permissions apply to a predefined set of users who share access to the file or directory. Groups are an efficient way to manage permissions for multiple users with similar needs.
Others (o): The “others” category includes everyone else who is neither the owner nor a member of the group associated with the file or directory. These permissions are the most open and typically apply to all users on the system.
Numeric Representation of Permissions
Permissions can also be expressed numerically: read = 4, write = 2, execute = 1. These values are summed for each user category, producing a three-digit number that succinctly represents a file’s permissions.
|
Permission
|
Value
|
|---|---|
|
Read (r)
|
4
|
|
Write (w)
|
2
|
|
Execute (x)
|
1
|
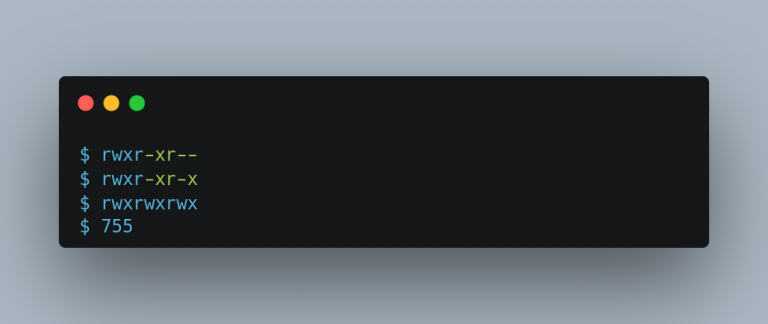
For example, a permission code of “755” indicates the owner has full access (7 = 4+2+1), while group members and others have read and execute permissions (5 = 4+1), but cannot write to the file.
How to Use chmod to Modify Permissions
The chmod command is used to change file permissions. It lets you set or modify the permissions for a file or directory using either symbolic notation or octal notation.
Symbolic notation: This method uses letters (u, g, o, a) and symbols (+, -, =) to add or remove permissions.
|
Symbol
|
Meaning・Use for
|
|---|---|
|
u
|
User (owner of the file)
|
|
g
|
Group (users who are in the same group as the file)
|
|
o
|
Others (everyone else)
|
|
a
|
All (a combination of u, g, and o)
|
|
+
|
Adds the specified permission
|
|
-
|
Removes the specified permission
|
|
=
|
Sets the specified permission and removes all others
|
Example: To add write permission for the user and group and remove all permissions for others on a file named example.txt, you can use the following command:
chmod ug+w,o-rx example.txt
Octal Notation: This method uses three digits (0-7) to represent permissions for the owner, group, and others. Each digit corresponds to read (4), write (2), and execute (1) permissions.
|
Digits (0-7)
|
Corresponding Permissions
|
|---|---|
|
0
|
No permissions
|
|
1
|
Execute (1)
|
|
2
|
Write (2)
|
|
3
|
Write + Execute (2+1)
|
|
4
|
Read (4)
|
|
5
|
Read + Execute (4+1)
|
|
6
|
Read + Write (4+2)
|
|
7
|
Read + Write + Execute (4+2+1)
|
Example: To give read and write permissions to the owner, read-only permission to the group, and no permissions to others on a file named example.txt, you can use the following command:
chmod 640 example.txt
Understanding User and Group Ownership
In Unix-based systems, each file and directory has two ownership levels: user ownership and group ownership. Understanding these levels is crucial because they directly determine who can access, modify, or execute a file or directory.
User Ownership:
The user who creates a file or directory becomes its owner by default. This owner has special privileges and can change the file’s permissions, read, write, and delete it, regardless of the permissions set for others.
Group Ownership:
Each user on a Unix system belongs to one or more groups. A file or directory can be assigned to a specific group. Users who are members of that group obtain group ownership of the file or directory. Group ownership lets group members access the file according to its group permissions.
In Unix-based systems, each file and directory has two ownership levels: user ownership and group ownership. Understanding these levels is crucial because they directly determine who can access, modify, or execute a file or directory.
ls -l file.txt
The output of this command will display information in a format like the following:
-rw-r--r-- 1 user1 group1 1234 Sep 6 10:00 file.txt
Explanation:
Here is a breakdown explanation of what each column represents:
-rw-r–r–: These characters represent the file’s permissions. The first character indicates the file type (in this case, a regular file), followed by three sets of permissions for the file owner, group owner, and others.
1: This number indicates the number of hard links to the file.
user1: This is the name of the file owner.
group1: This is the name of the group owner.
1234: This is the file size in bytes.
Sep 6 10:00: This is the date and time of the last modification.
file.txt: This is the file or directory name.
In the example above, user1 owns the file file.txt, and it is part of the group group1. The file’s permissions are rw-r–r–, which means that the owner has read and write permissions, while the group and others can only read the file.
Changing File Ownership
Changing the file ownership of a file or directory, including its contents, is an essential task that allows the transfer of ownership of files and directories between users and groups. Let’s explain gradually, how to change the owner and group of a file or directory using the chown and chgrp commands.
How to Change File Ownership using "chown"
The chown command changes the owner of a file or directory. It allows the transfer of ownership from one user to another. To use chown, the operator will need the superuser (root) privileges or ownership of the file or directory.
The basic syntax for chown is as follows:
chown [new_owner:new_group] [file_or_directory]
Explanation:
> new_owner: The new owner’s username.
> new_group: The new group’s name (optional).
> file_or_directory: The file or directory whose ownership that want to change.
How to Change File Ownership using "chown"
The chgrp command changes the group ownership of a file or directory. Like chown, the operator will need the superuser privileges or ownership of the file or directory to use chgrp.
The basic syntax for chgrp is as follows:
chgrp [new_group][file_or_directory]
Explanation:
> new_group: The new group’s name.
> file_or_directory: The file or directory whose group ownership that want to change.

Code Examples for Changing Ownership
Here are some practical code examples for changing ownership of files and directories:
1. Changing File Ownership with "chown":
To change the owner of a file named file.txt to a user named newuser, use the following command:
To change both the owner and group ownership of the same file, use:
2. Changing Directory Ownership with "chown":
To change the owner of a directory named mydir and all its contents to newuser, use the -R option for recursive ownership change:
3. Changing Group Ownership with "chgrp":
To change the group ownership of a file named file.txt to a group named newgroup, use the following command:
4. Changing Group Ownership of a Directory with "chgrp":
To change the group ownership of a file named file.txt to a group named newgroup, use the following command:
5. Common Chmod Commands
・chmod +r test.txt
・chmod 444 test.txt
・chmod ugo=r test.txt
Grant read & write permissions to all users:
・chmod +rw test.txt
・chmod 666 test.txt
・chmod ugo=rw test.txt
Remove execute permission for all users:
・chmod -x test.txt
・chmod ugo-x test.txt
Grant read permission to the group only:
・chmod g+r test.txt
・chmod 664 test.txt
Thank You