What is Basic Authentication?
Basic authentication is one of the authentication methods defined in HTTP. It is also called basic authentication.
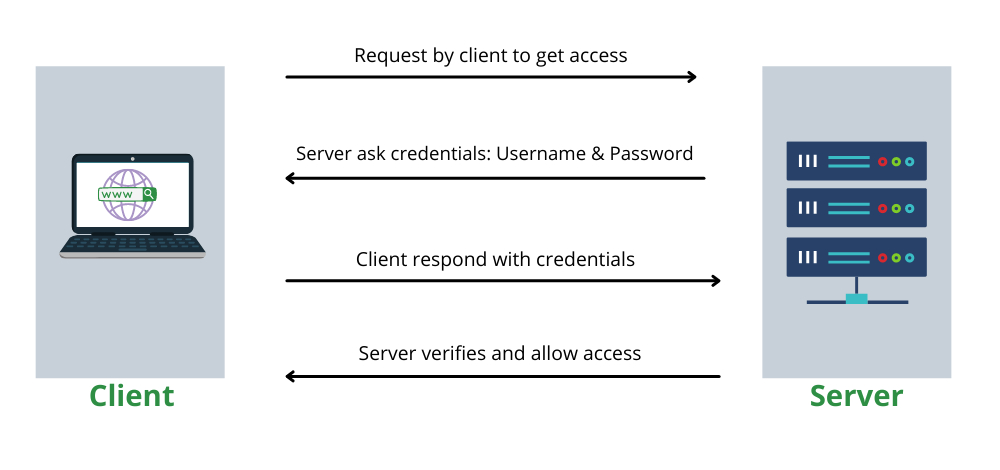
In basic authentication, the username and password pair are connected with a colon “:” and sent encoded in Base64. This has the disadvantage of making it easy to eavesdrop on or tamper with, but it is widely used because it is supported by almost all web servers and browsers.
Source: Wikipedia, the free encyclopedia: Basic authentication
This tutorial explains how to implement .htaccess/.htpasswd directory protection on your web server, a common method for adding authentication and restricting access to website areas.
What You Will Need
- Access to your web server (via SSH, FTP, or your web hosting control panel).
- Ability to create or edit files on your server.
- Basic understanding of navigating your server’s file system.
Step 1: Create the .htpasswd File
The .htpasswd file stores the usernames and encrypted passwords for users who are allowed access.
1. Choose a Secure Location: Decide where to store your .htpasswd file. It should be outside of your publicly accessible web directory to prevent unauthorized access. For example, if your web directory is /public_html, you might store .htpasswd in /.
2. Generate the File:
-
- On a Unix/Linux System: Open a terminal and use the
htpasswdutility. If it’s not installed, you may need to install it using your package manager (e.g.,apt-get install apache2-utilson Debian/Ubuntu).htpasswd -c /path/to/.htpasswd usernameReplace/path/to/.htpasswdwith the full path where you want to store the file, andusernamewith the desired username. You’ll be prompted to enter and confirm a password for the user. - Online Generators: Alternatively, you can use an online
.htpasswdgenerator to create the username and password pair. Remember to upload the generated.htpasswdfile to the location you’ve chosen.
- On a Unix/Linux System: Open a terminal and use the
Step 2: Create the .htaccess File
The .htaccess file will be placed in the directory you wish to protect. It tells the web server to check for authentication.
1. Navigate to the Directory: Go to the directory you want to protect. If accessing your server via SSH or FTP, change to the desired directory.
2. Create/Edit .htaccess: Create a new .htaccess file, or edit it if it already exists. Add the following lines:
AuthType Basic
AuthName “Restricted Area”
AuthUserFile /path/to/.htpasswd
Require valid-user
-
-
AuthType Basicindicates the authentication type.AuthNameis a message that will be displayed in the login prompt.AuthUserFileshould be the absolute path to your.htpasswdfile.Require valid-usermeans any valid user listed in.htpasswdcan access the directory.
-
Step 3: Test Your Setup
After setting up both files, it’s time to test:
-
-
- Open a web browser and navigate to the protected directory.
- You should be prompted to enter a username and password.
- After entering the correct credentials, you should gain access to the directory.
-
Troubleshooting
-
-
- File Permissions: Ensure the
.htpasswdfile is readable by the web server and not accessible from the web. - Server Configuration: Some servers might require additional configuration to allow
.htaccessfiles to override server settings. If your setup is not working, check your server’s main configuration file (e.g.,httpd.conffor Apache) forAllowOverridedirectives.
- File Permissions: Ensure the
-
Additional Notes
-
-
- Security: Regularly update your passwords and monitor access logs for unauthorized attempts.
- Multiple Users: To add more users, use the
htpasswdcommand without the-coption:htpasswd /path/to/.htpasswd anotheruser.
-
These steps add basic authentication to your website, useful for protecting sensitive areas. However, this method is not a substitute for a comprehensive security strategy.
Thank You